This article applies to our BBB Plugin customers.
Before proceeding with the installation of our BBB plugin, it is important to verify the necessary requirements to ensure its proper functioning. Follow this step-by-step guide to complete the process correctly:
1. Verify the requirements
Verify that IonCube is installed
Go to: Site administration > Server > PHP Info or you can use a similar URL: https://yourmoodleurl.com/admin/phpinfo.php
Search for the word ionCube to ensure that version 12.0.0 or higher of this module is installed and enabled.
In the screenshot below you can see that version 13.3.1 is installed (higher versions are also compatible).

If it is not available, please contact the server administrator to enable it.
Other requirements
It is recommended to use Moodle version **3.8 or higher** (minimum 3.6). PHP version **7.4** (minimum 7.2) or higher is recommended.
For Moodle 4.XX versions, PHP 8.1 is recommended.
Some PHP extensions required by Moodle and by this plugin are: curl and openssl.
2. Download and install the BBB plugin
Please use the link you have received to download the plugin.
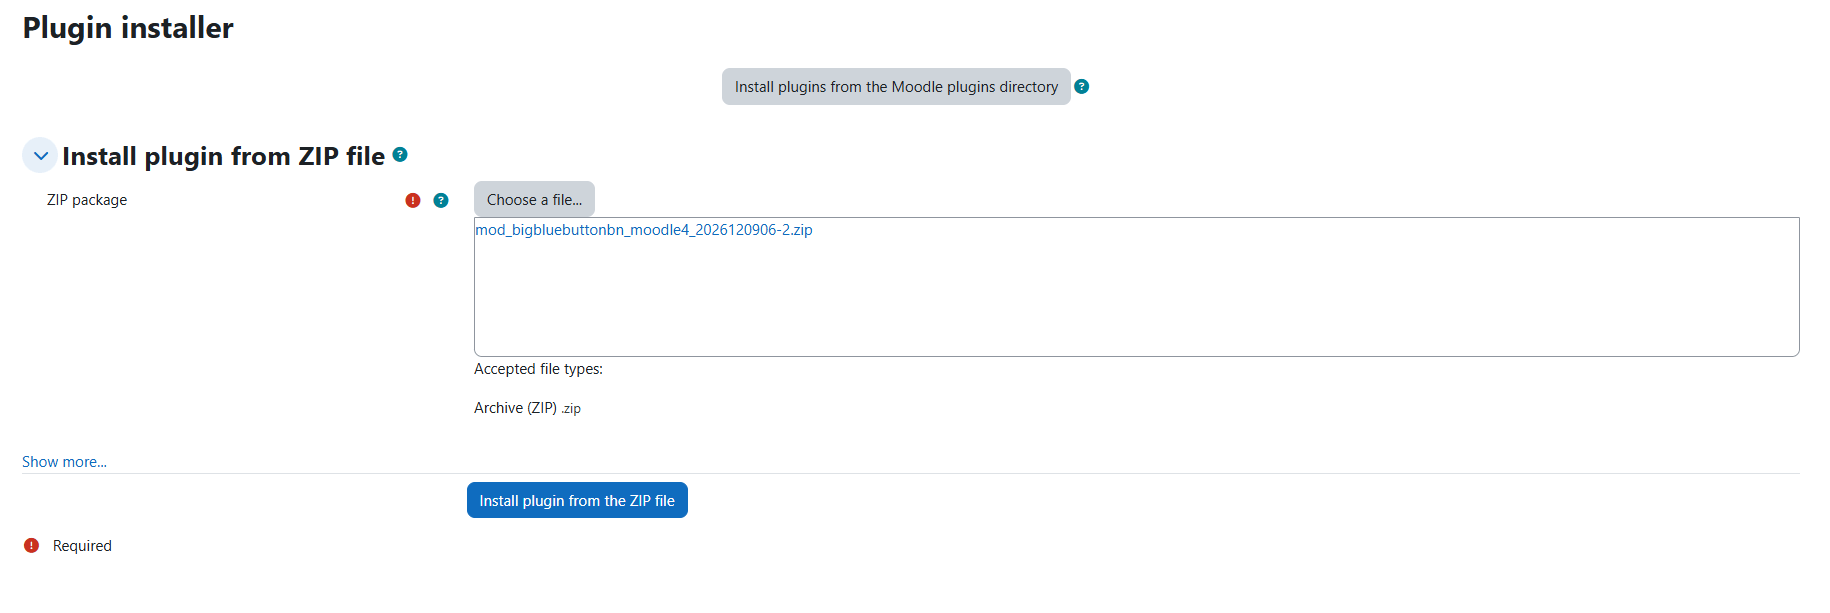
Go to: Site administration > Plugins > Install plugins
or you can use a similar URL: https://yourmoodleurl.com/admin/tool/installaddon/index.php
Now drag the file, wait until the bar completes and finishes uploading, and then click the “Install plugin” button.
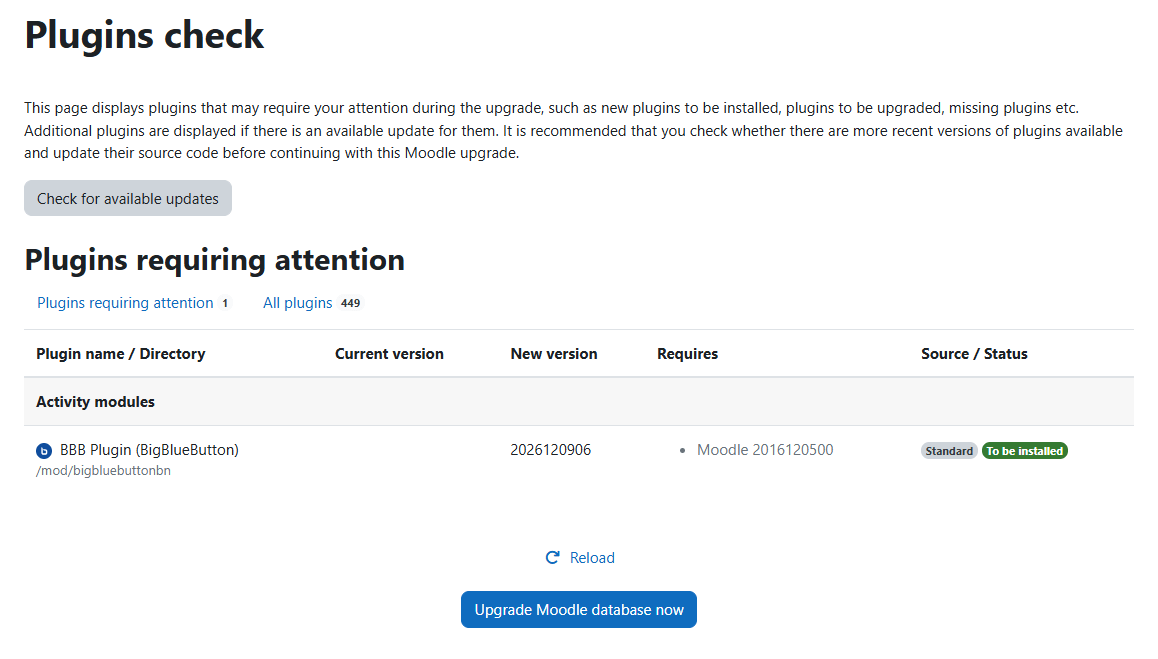
The following steps are routine when installing plugins.
If you have installed a BigBlueButton plugin before, you will see a warning. You may proceed. You will see Moodle’s server checks; click “Continue”, and in the next step click “Upgrade database” and “Continue.”
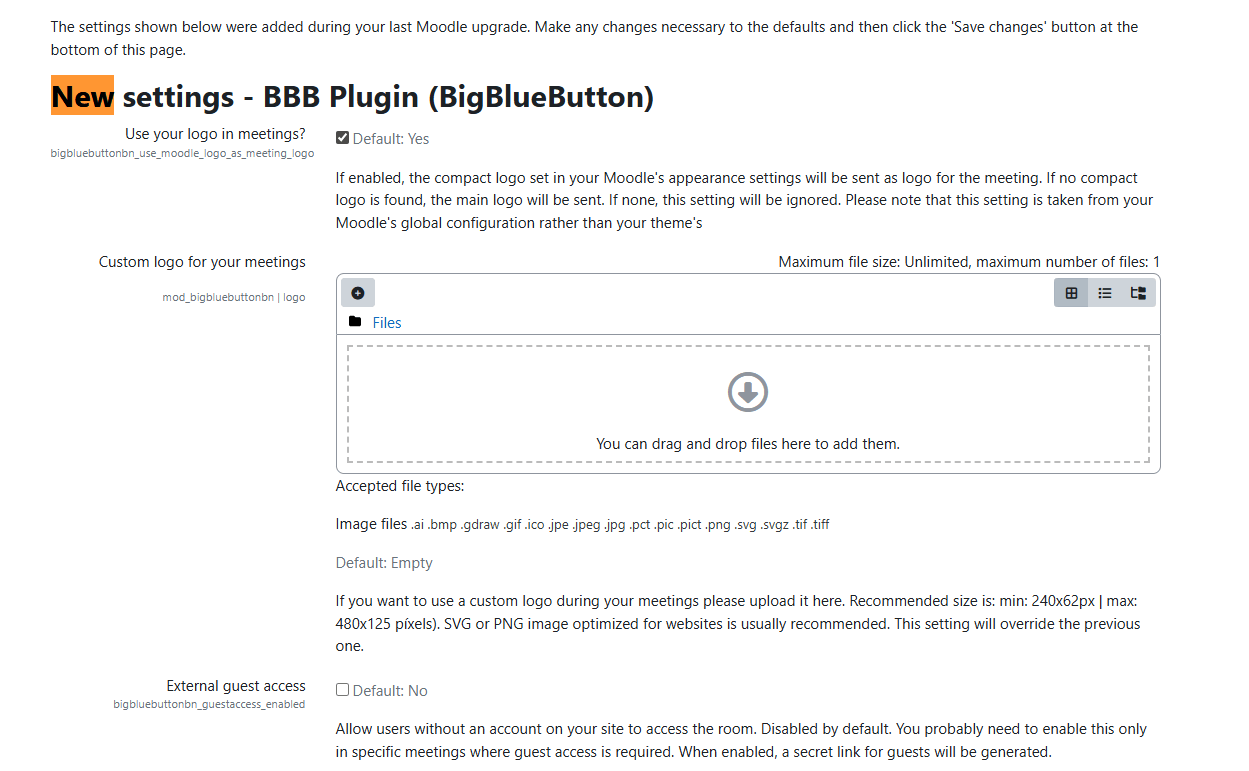
Then the “New Settings” interface will appear.
If you have installed a BigBlueButton plugin before, you will only see a few of the settings. All settings can be configured in detail later.
Please ignore any fields related to the service subscription (Global user limit, Renewal key, etc.). Click Save changes.
Note: some texts and translations may change slightly. The first fields, marked with an X in the following image, are fields you do not need to configure at this step.
3. Activate the service
Please use the link provided to activate the service. It is assumed that you are authenticated with an administrator account. If activation is successful, you will see something like this:
")
Remember that you can now check the service status at any time. To do so, please go to:
Site administration > Plugins >> Find the section “Activity modules” > BBB service status
Or you can use a similar URL: https://yourmoodleurl.com/mod/bigbluebuttonbn/status.php
In this interface you can check the service status and the number of users using the service. You can also generate a list of ongoing meetings.
4. Review important and recommended settings
Go to: Site administration > Plugins >> Find the section “Activity modules” > BBB Videoconference or you can use a similar URL: https://yourmoodleurl.com/admin/settings.php?section=modsettingbigbluebuttonbn
Select the roles that will be Moderators in the meetings or videoconferences.
Using the CONTROL key you can select several roles. In the image below, the roles that are generally recommended for this function are marked. It is recommended not to select roles such as “Student” to be enabled as “Moderator.”

(Optional) Usually, “Preload presentation” and “Default presentation file” are enabled and configured (it is recommended to be in PDF format and landscape orientation).
Note: Avoid changing the values of the settings related to your subscription to the service (they are the first ones).
Done!
You can now start creating videoconferences.